Overview
The Translations module enables multilingual collaboration by allowing document and free-text translations directly within Alluvial.
It is powered by Azure AI Translator, a cloud-based neural machine translation service.
- Basic Translation – Available by default for supported languages.
- Custom Translation – Allows specialized translation models for domain-specific language needs.
Getting Started
Before getting started, you may need to add the Translations app to your project. This can be done from the Marketplace section of Alluvial. See Marketplace Apps for more information on how to add and manage apps in your project.
Core Concepts
Basic vs. Custom Translation
- Basic Translation uses the default translation service for supported languages.
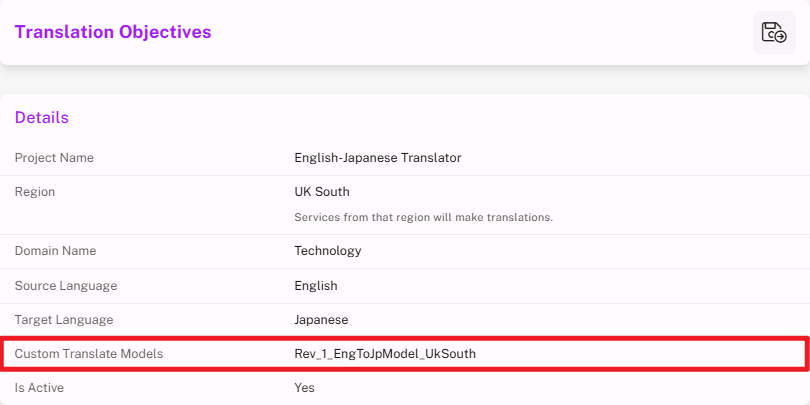
- Custom Translation uses a model associated with a Translation Objective so translations can be tailored to a specific domain or terminology set.
Translation Objectives
A Translation Objective defines:
- Source and target languages
- Processing region
- Subject matter domain
Translation Objectives are required only when you want to use Custom Translations.
Document vs. Free Form Text Translation
- Document Translation is used when you want to translate uploaded files.
- Free Form Text Translation is used when you want to translate text entered directly into the interface.
Common Tasks
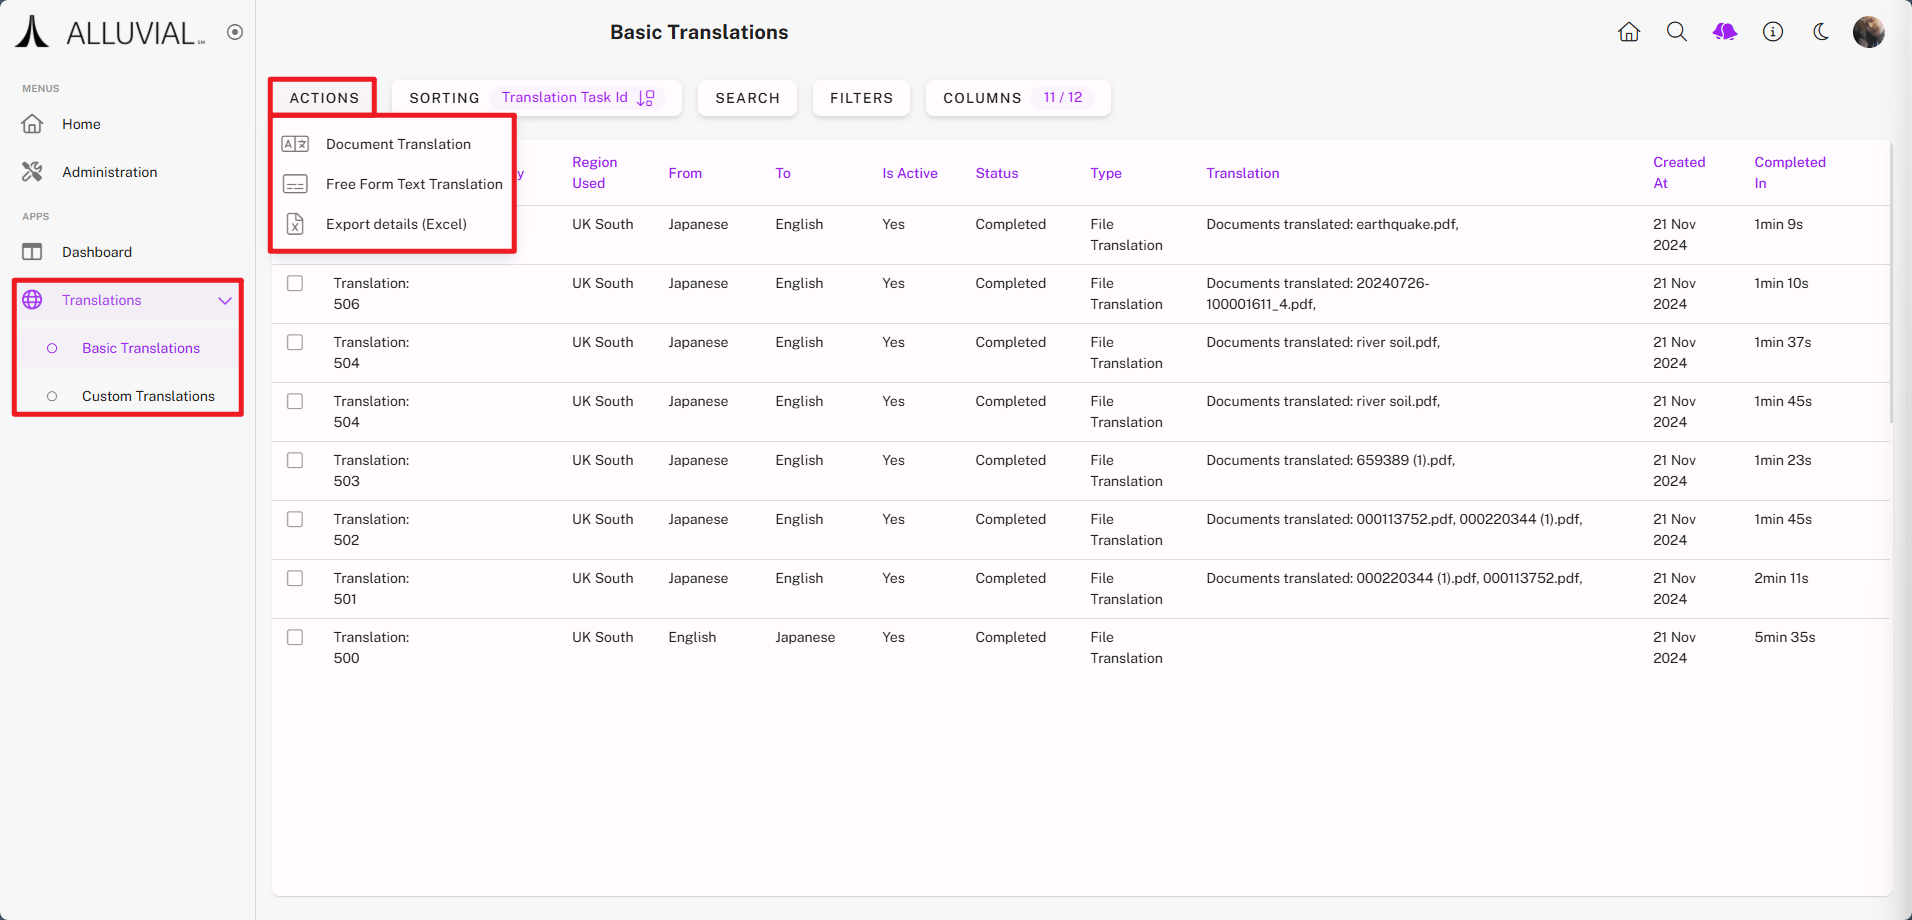
From your project dashboard, open the Translations dropdown and choose:
- Basic Translations
- Custom Translations (if using a Translation Objective)
From the translation search pages, you can:
- View previous translation results.
- Create a Document Translation.
- Create a Free Form Text Translation.
- Export Details (Excel) of translation history.
Create a Translation Objective
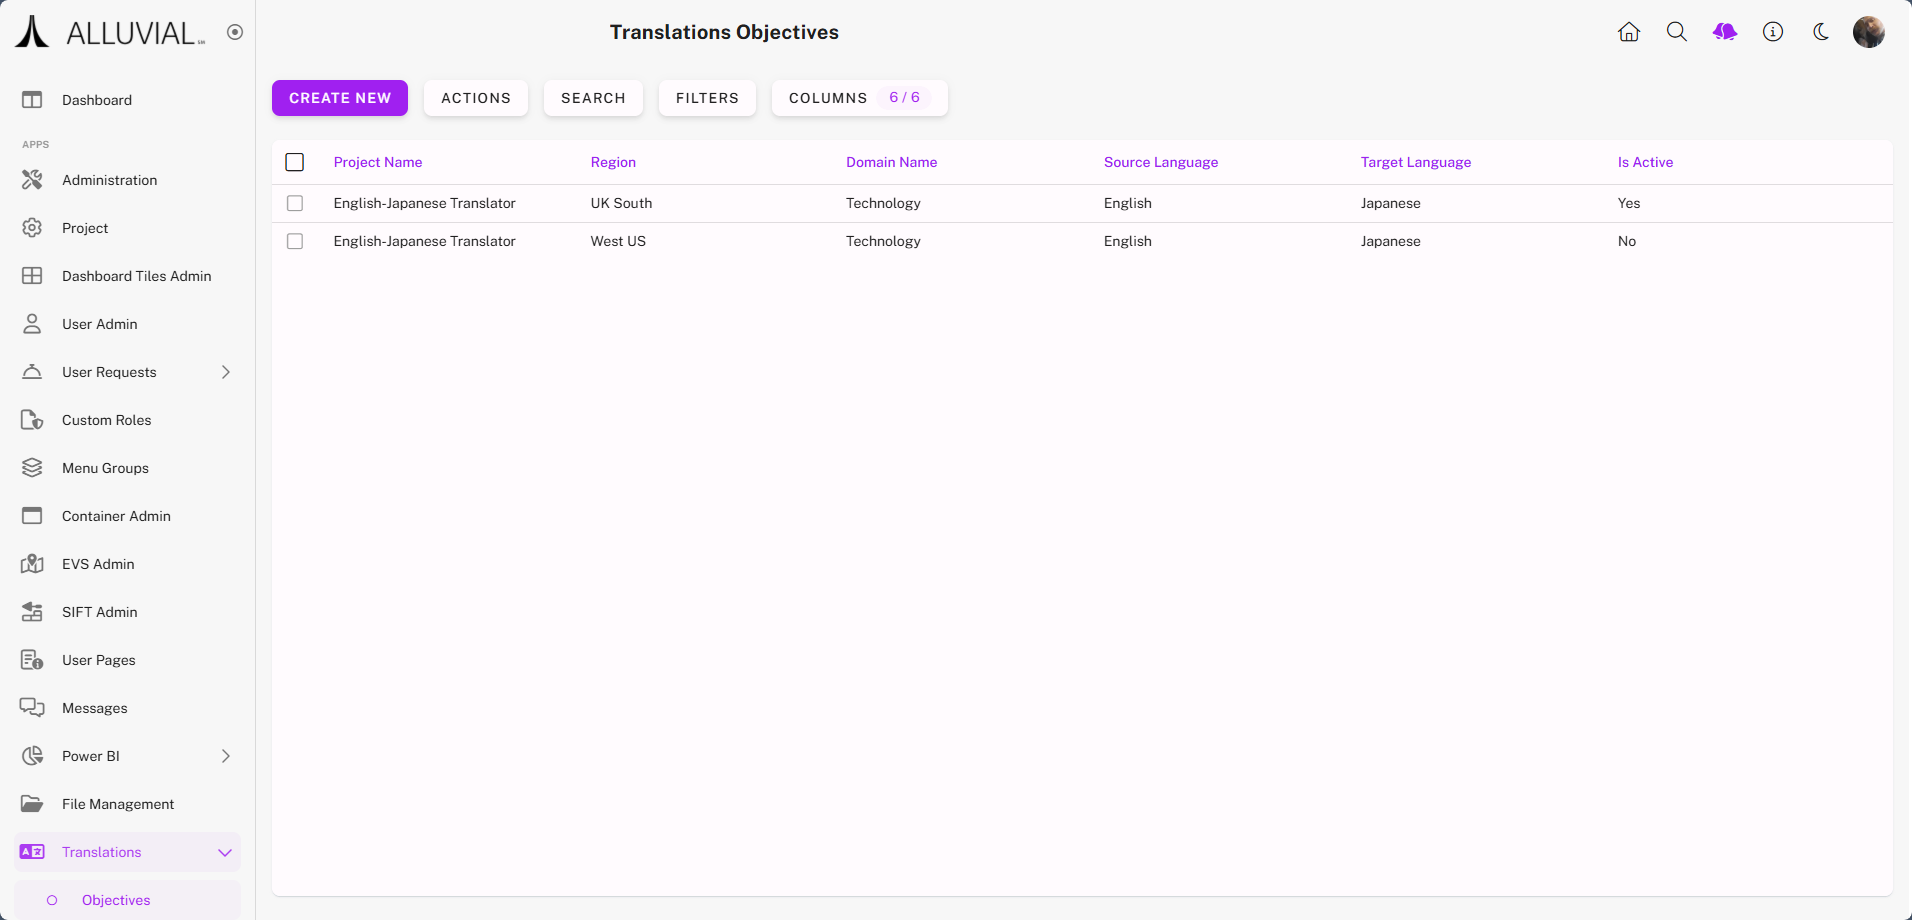
This is required only for Custom Translations.
- Click CREATE NEW.
- Complete the form.
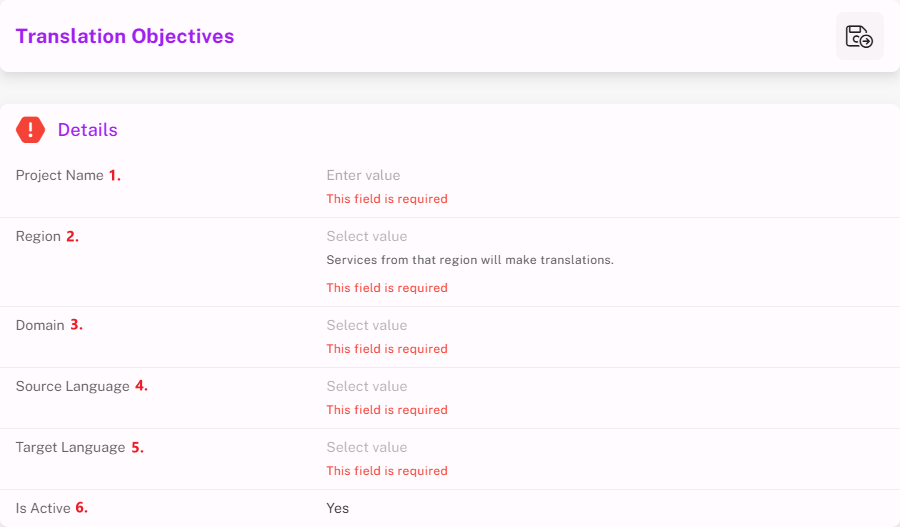
- Project Name – Name of the Translation Objective.
- Region – Closest processing region for performance.
- Domain – Subject matter domain.
- Source Language – Language of original content.
- Target Language – Language to translate into.
- Is Active – Defaults to “Yes”; can be set to “No” later.
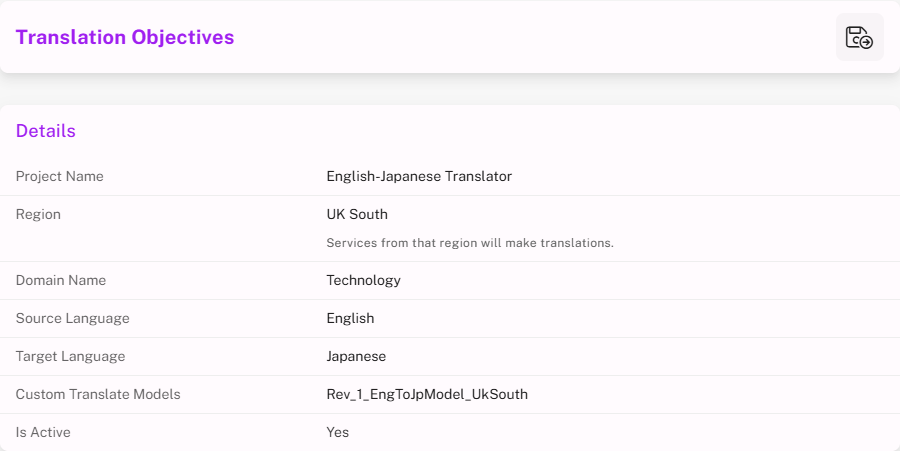
IMPORTANT: After saving, only the Project Name and Is Active fields can be modified.
- Save to return to the objectives list.
Create a Basic Document Translation
- From the project dashboard, go to Basic Translations -> Document Translation in the ACTIONS menu.
- Complete the form.
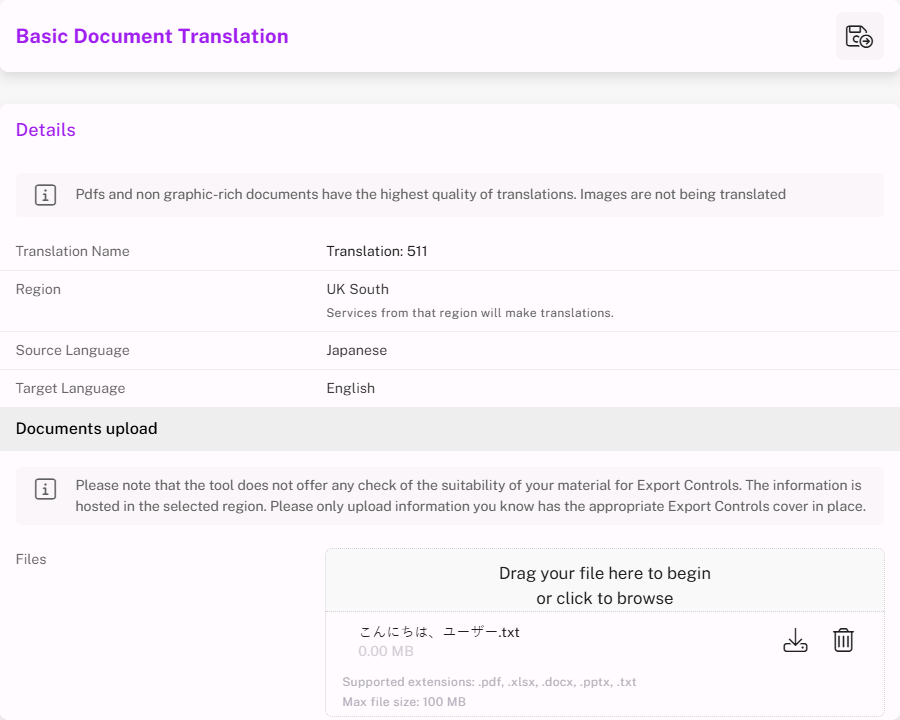
Example: Uploading
こんにちは、ユーザー.txt("Hello, user").
- Save and wait for processing.

- Download the translated file once ready.
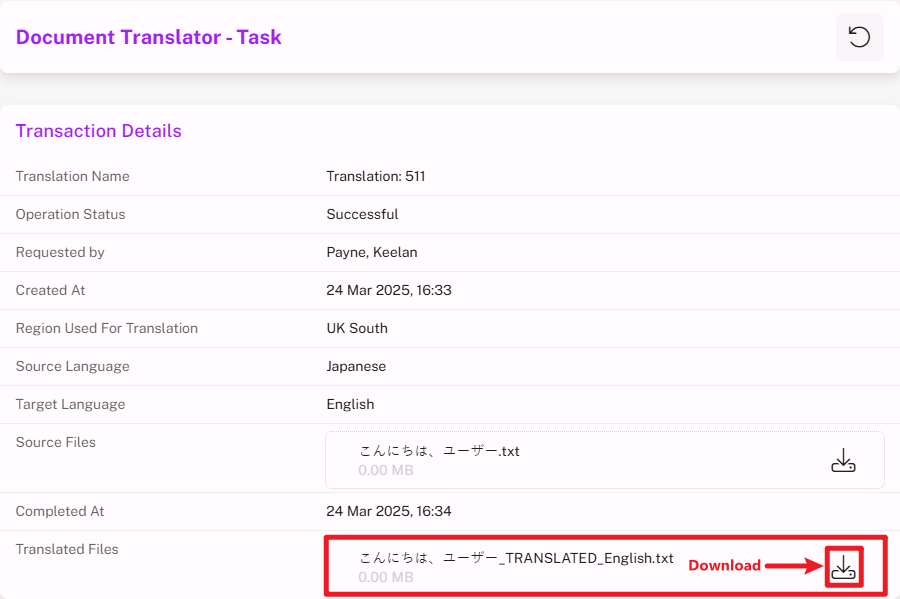
Create a Basic Free Form Text Translation
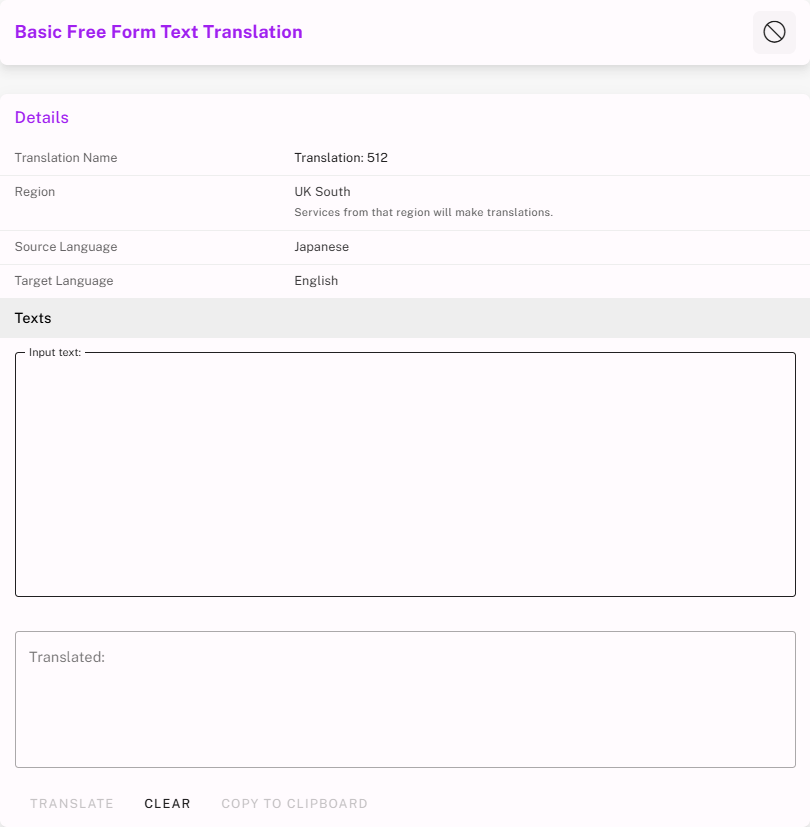
- From the project dashboard, go to Basic Translations -> Free Form Text Translation in the ACTIONS menu.
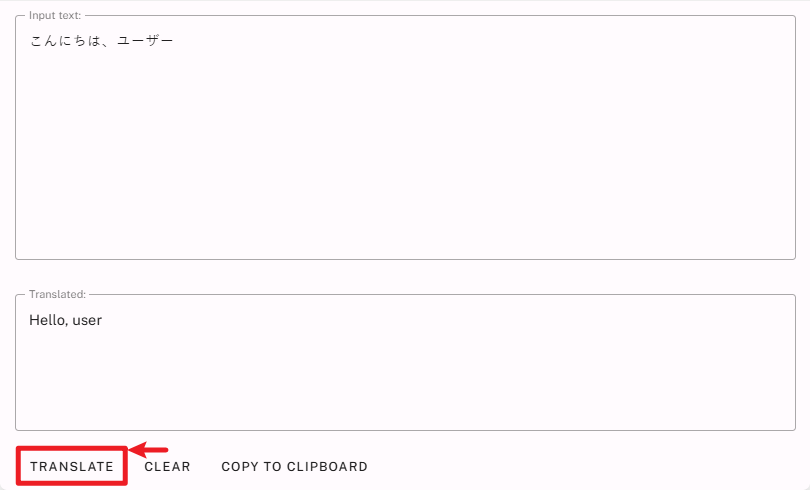
- Enter text and click TRANSLATE.
- The translated output appears below.
Delete Translation Records
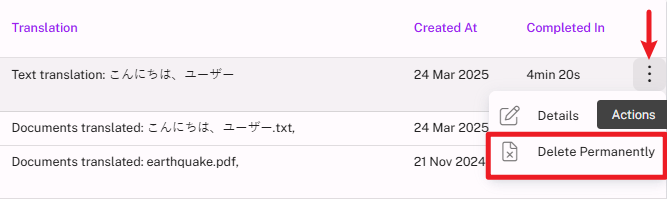
- Use the vertical ellipses (⁝) for a single record.
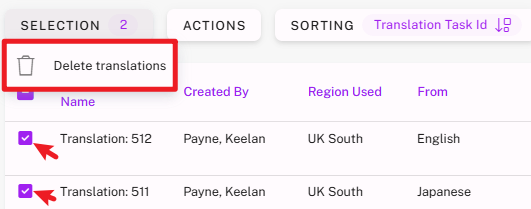
- Select multiple records, then click SELECTION → Delete in bulk.
Additional Functionality
Custom Document Translation
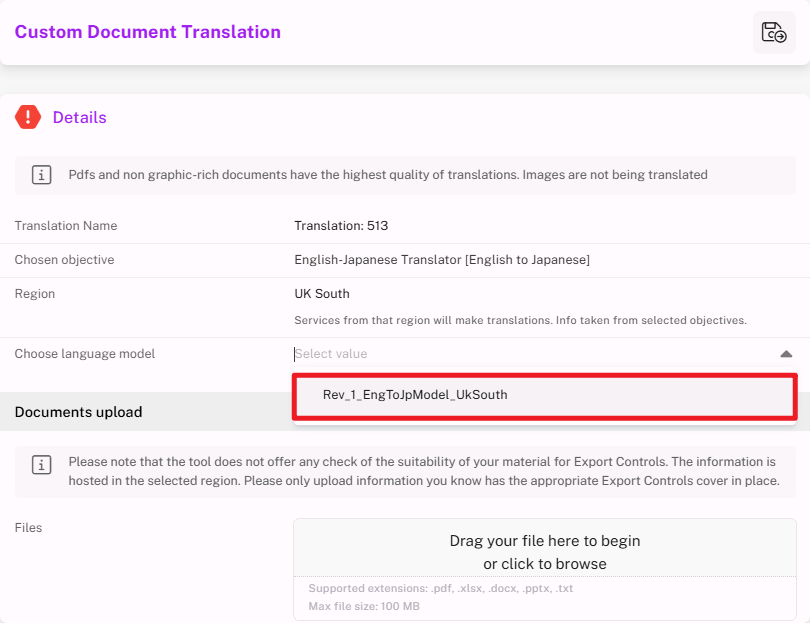
Custom Translations follow the same process as Basic, but require selecting a Model from a Translation Objective.
Exporting Translation Details
From the Translations search page, select Export Details (Excel) from the ACTIONS menu to download a file containing metadata of past translations.
